RADIANT FLOOR PEX PIPES INSTALLATION
During the heated flooring installation, how should PEX piping be spaced?

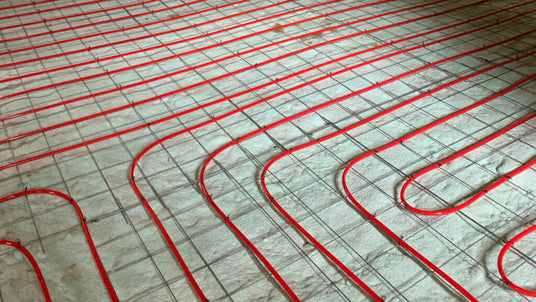
Specifically, when dealing with exterior walls, it is advisable to run two rows of PEX piping spaced 6 inches apart. As for the filling for the rest of the room, you have the option of choosing either 9-inch or 12-inch spacing, depending on your specific requirements.
In cases where curtain walls are present, we suggest increasing the number of PEX piping rows to six, all spaced 6 inches apart, before proceeding with the filling. This adjustment ensures sufficient coverage and efficiency for the curtain wall area.
For garage installations, we recommend placing six rows of PEX piping spaced 6 inches apart along the garage doors before proceeding with the filling. This configuration is specifically tailored to garages, providing enhanced performance and optimal heating distribution.
By following these guidelines for pipe spacing, you can ensure an effective and well-designed system that meets the needs of your specific project, whether it involves exterior walls, curtain walls, or garages.
What is the best spacing for PEX piping in a radiant heating system? 9 inches or 12 inches?

There are some differences between installing the piping at 9 inches and at 12 inches.
Firstly, a 300 linear feet circuit installed at 9 inches will cover approximately 200 square feet, whereas a 300 linear feet circuit at 12 inches will cover around 250 square feet.
Therefore, with piping installed at 12 inches, you'll have fewer circuits, so the system will be a bit cheaper than at 9 inches. However, the temperature difference of the liquid between the supply and return will be greater with the 12-inch pipes compared to the 9-inch pipes.
Additionally, when there are concrete slabs of around 2 inches thick, there isn't much concrete above the pipes. So, with the 9-inch pipes, there's less chance of experiencing a temperature difference between two pipes compared to when the pipes are spaced at 12 inches.
In conclusion, the closer the pipes are to each other, the more uniform the floor temperature will be.
How big can a radiant heating system be?

While there is no specific limit to the size a heating system can be, there is a limit to what a manifold can handle.
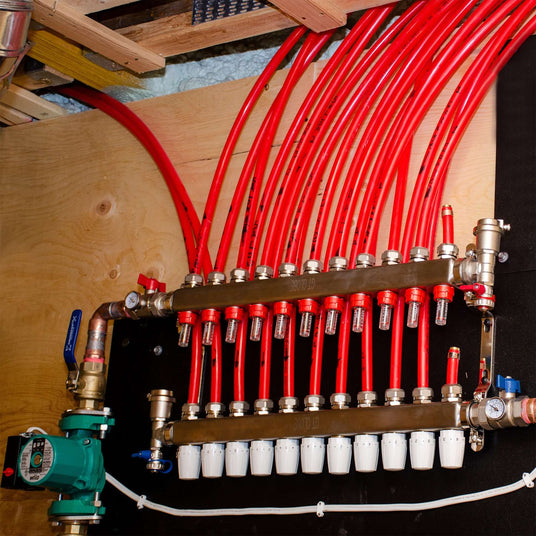
In a radiant heating system, PEX pipe circuits are connected to a manifold, which functions as a liquid distributor. Typically, manifolds are designed to support a range of 2 to 12 circuit distributors each. It's important to note that exceeding 12 circuits on a single manifold is not recommended, however, if your heating system requires more circuits it is possible to install multiple manifolds to accommodate the additional circuits.
Usually, one manifold per floor is sufficient for most applications. However, if your system requires more circuits beyond what a single manifold can handle, an additional manifold will need to be installed.
It's worth mentioning that the placement of the additional manifold doesn't have to be restricted to your heating panel. It can be strategically installed in a location that optimizes the distribution power of your system.
In summary, while there isn't a definitive limit on the number of pipe circuits a heating system can handle, the capacity is determined by the limitations of the manifold.
By understanding the capabilities of the manifold and installing additional manifolds when necessary, you can ensure an efficient and effective heating system that meets your specific needs.
How to install PEX piping?
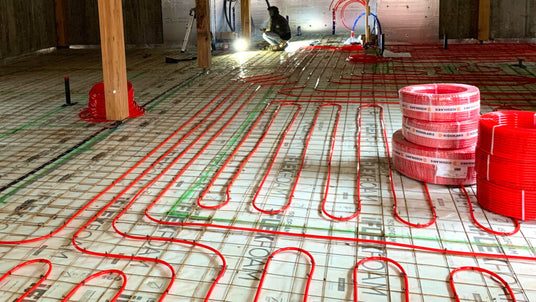
We highly recommend utilizing an PEX pipe uncoiler during the installation process to facilitate smooth and efficient handling of the PEX piping. This will help prevent tangling and ensure proper alignment as you lay out the radiant heating system`s PEX piping.
Next, it is essential to sleeve your tubing at the points where the wall meets the floor for both the outgoing and incoming sections. This step is crucial because bending the tubing weakens it, and sleeving the folded areas adds an extra layer of protection. By encasing these areas with a plastic sleeve, you can prevent accidental kinking of the pipes when the concrete is poured.
To pressurize your pipes, we offer convenient kits that include all the necessary components. However, please note that we do not provide the required tools, such as a PEX crimping tool and air compressor. These tools are essential for the pressurization process and need to be sourced separately.
Pressuring your PEX piping with air serves two important purposes.
Firstly, it helps detect any potential leaks in the system, ensuring that your PEX piping is intact and functioning properly.
Secondly, it maintains the stiffness of the pipes during the concrete drying process. It is advisable to keep the pipes pressurized until you are ready to install the manifolds, as this ensures the structural integrity of the PEX piping throughout the construction phase of your building.
Lastly, it is necessary to clearly label the PEX piping and indicate the direction of the water flow. This can be done using a marker or other suitable labeling method. Proper identification will make future maintenance and troubleshooting much easier, saving you time and effort.
By following these recommendations and using the appropriate tools and techniques, you can ensure a smooth and successful installation of your radiant heating system.
How to secure PEX piping?

Securing PEX tubing depends on the insulation of the slab.
- If your pipes are installed on a wire mesh, simply use tie-wraps.
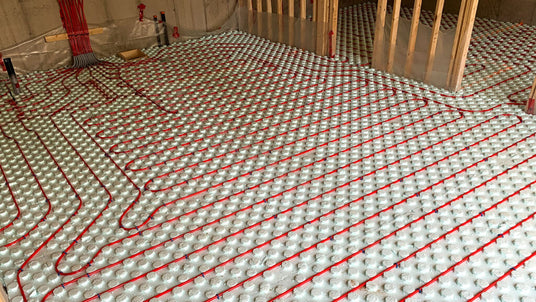
- If your pipes are installed with a celled insulating board, use U-Clips.
- If your pipes are fixed on a plywood, use J-Clips.
How should one proceed to install the pipes?

PEX piping is installed in an order unique to the project. In general, pipes should not intersect each other, meaning, circuits must exit one side of the panel and return by the other side. PEX piping crossing each other is avoided at all costs.
Be aware of the area each circuit will cover, 9’’ spacing covers approximately 200 square feet while 12’’ spacing covers 250 square feet. For rooms that are filled with a single circuit, two rows with a distance of 6’’ must first be made along the exterior wall(s). They must then be filled with either 9’’ spacing or 12’’ spacing. When a room requires to be filled with several circuits, we recommend separating the pipes that run along the exterior walls into several circuits. This will prevent one circuit from having more heat loss than the others.
Note: a half turn with the pipes at 9’’ or 12’’ spacing is done well, however, a 180* turn with 6" spacing is very tight, it is optimal to turn wider and return to 6’’ spacing afterwards.
How many fixtures are needed to properly secure PEX piping?

For tie-wrap and j-clip fixtures, we recommend placing one fixture every 30 inches of PEX piping, adding more in the curves of a circuit.
As a general guideline, you should calculate a 2/3 fixture-to-linear-feet ratio, which means using approximately 200 fixtures for a 300 linear feet circuit. However, the number of fixtures needed for honeycomb insulation panels can vary.
It is advisable to install an adequate number of fixtures in the curves, where the pipes tend to rise or sink. Keep in mind that while the 2/3 ratio is a good starting point to ensure sufficient fixtures for your pipes, each system, especially those using honeycomb insulation panels, may differ from one building to another.
Therefore, it is important to have an extra bag of fixtures on hand. If you find yourself with leftover fixtures after the installation, you can simply return them to us for a refund.


